
I'm going to start off with these drapey tops. I've seen them called all sorts of different things, so I'm not sure what the "official" title is. The lovely thing about this style shirt is, the sleeves are not sewn in like a regular sleeve making them super simple to sew. They are so comfy to wear, and can be dressed up or down depending on accessories.
These two are from Anthropologie. The first is $68.00, the second is $58.00. (The links to the listings are below each picture)


These next two are from Nordstrom. The first is $54.00, and the second is $178.00. (ummmm....wow, just a teensie bit expensive?)


As you can see, while the basic style is the same, each one is slightly different in the finishing details. The sleeve length, necklines, waist and materials are all varied.
While the little girls were down for a nap, I came up with two of my own versions. (With the help of strong cup of coffee to keep myself awake) My first version, I made out of a turquoise knit.

My second one has slightly longer sleeves, looser fit, and no binding around the neckline. I made it with a super soft cream colored knit.

Here is how I made them. Sorry, my method wasn't super specific since I was making it up as I went, but you should still get the general concept.
First off, make sure you pre-shrink your fabric before you start sewing. I laid out my fabric so that it was four layers thick with two folds along the edge. I used a loose fitting shirt I already had as my basic guide, so I wouldn't have to mess with measurements. I folded my shirt in half and laid along the two folds.
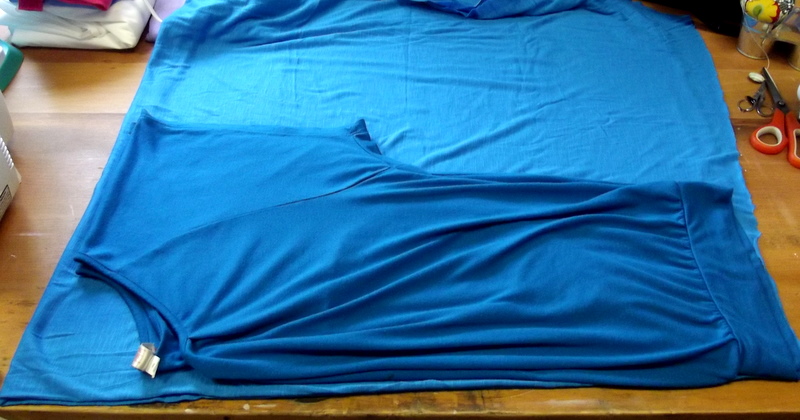
I cut out around the shirt, making the sleeves longer and the neckline a boat neck style. You want the sleeves to kind of sweep down gently to the side of the shirt with no sharp angles.
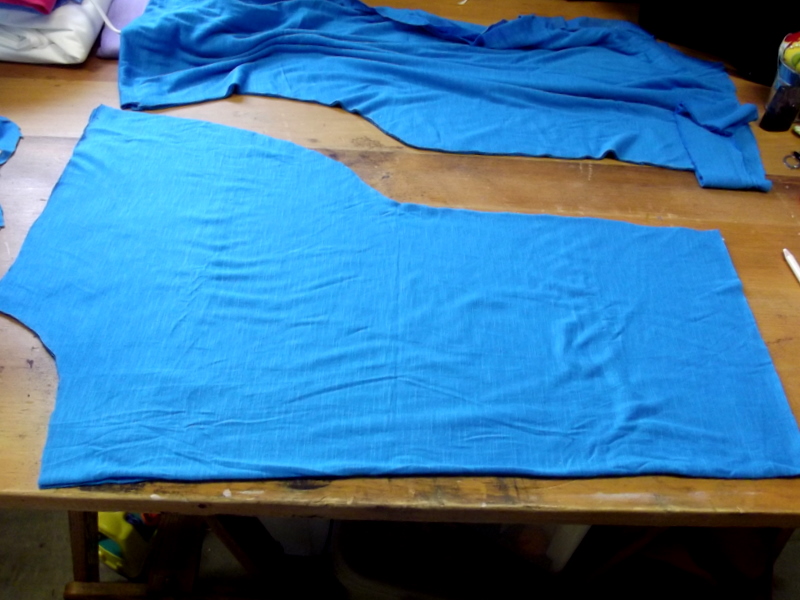
I turned right sides together and pined at the edge of the neck and the under arm.

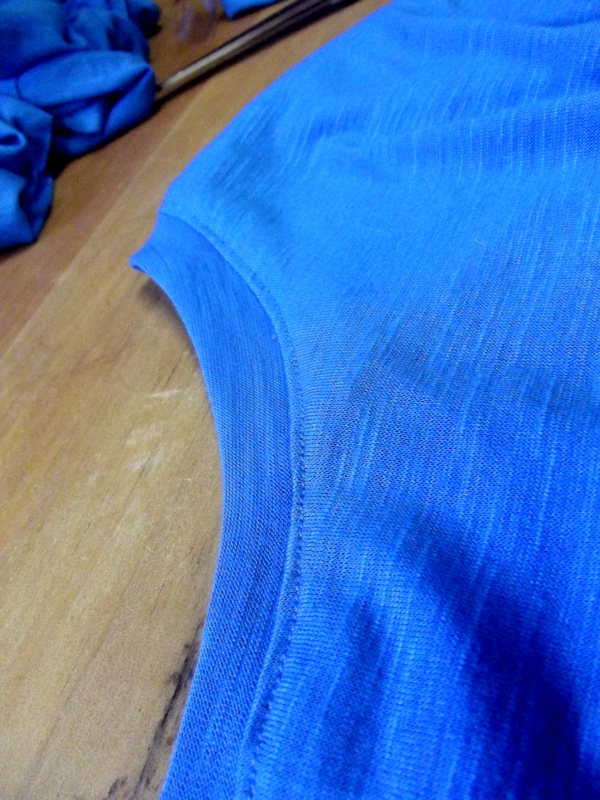
I sewed along the top shoulder and from the arm pit down the side seams. I left about 8 inches of the sleeve open. You don't want it to be open too far down the side of the shirt.

Next, I cut an eight inch wide band for the bottom of the shirt. Make sure you pay attention to the stretch of your fabric... If your fabric only has a one way stretch, you want the stretch to be going width wise or it will be too tight even if its cut the right length. I didn't do that and had to go back and add in some fabric. I folded the band raw edges together, right sides out so that the fold was on the bottom.

Doing this prevents you from having to hem the bottom of the shirt. Sew the band on and then the bottom is nicely finished for you.
I double stitch hemmed the sleeves and then cut out binding for the neckline. I just cut a long strip about two inches wide. Fold it over and sew to the neckline.

I just trimmed off the excess when I got to the end and sewed the two ends together. Don't forget to stretch out the binding as you sew so that it keeps the neckline from sagging.
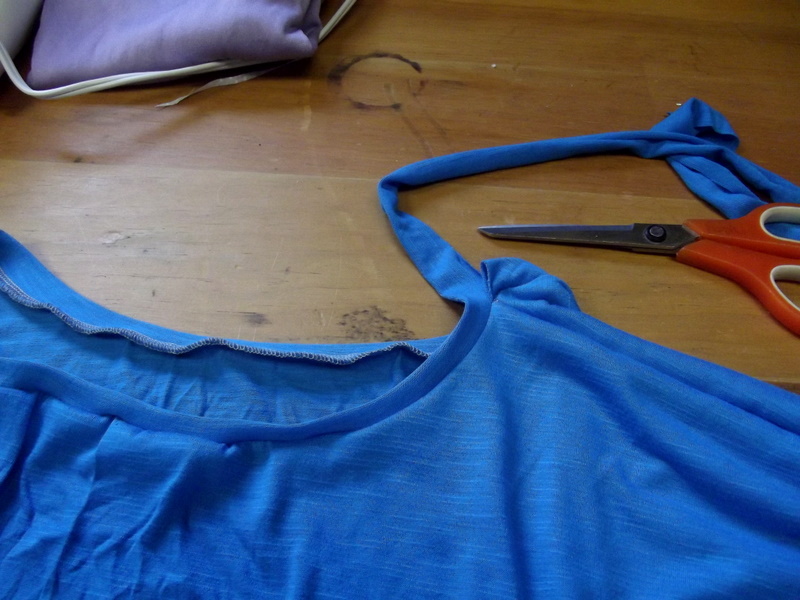
I top stitched around the neck to help it smooth out.
That all there is to it! The cream colored one I did basically the same. Mine cost me about $5.00 each. As with just about everything I sew, I learned some things to make me better at it the next go around. Hmmm, now what to make next?
" To every thing there is a season, and a time to every purpose under the heaven:"
Ecclesiasties 3:1
Linking to:
Tea Rose HomeSew Woodsy
Laugh Love Craft
Thank for sharing! You are a talented seamstress! May I ask where you purchased the fabric? I only buy quilting fabric, but I am getting into sewing skirts and perhaps shirts since I don't like much of anything in the stores. Most clothing that is my size is in the junior section, and it's not modest enough! LOL
ReplyDeletelove it!
ReplyDelete~mev
Wow, you are quite the seamtress! I sew alot but not clothing, that's always scared me a little. You did a wonderful job! Thank you for visiting my kitchen redo.
ReplyDeleteI love this style so much, so easy to wear. You did a great job. I'd love for you to stop by and link up to my Share the Wealth Wednesday Link Party at www.laughloveandcraft.com. I'm your newest follower.
ReplyDeleteGorgeous, my dear!
ReplyDeleteLove it! Gorgeous colors on you. Will have to try this soon.
ReplyDeletehow much fabric did you use? I would love to make one for myself! thx!
ReplyDeleteKira, did you get an reply to your post about how much fabric is needed. thanks
DeleteCould you give me an idea of how much material I need to purchase for a Med.Lrg. i'm guessing about 1/34 yds. Thank you so much for posting this, my daughter absolutely loves it so I want to make for her.
ReplyDeleteoh, I now see that Kira Smith has asked the same question. I couldn't find it anywhere on the instructions. thanks again
ReplyDelete