Monday, February 28, 2011

Details make the difference

      Details make the difference between something that screams homemade and something that could pass as store bought. I am very slowly learning to not be in such a hurry to finish projects...to spend a little more time on those all important details. Things as simple as changing the color of your thread to match what you are sewing can completely change the look of your finished project. This is my hardest thing to learn, I am not a perfectionist. I can't resist the urge to just get things done as quickly as possible. As a result there are more projects than I'd like to admit that I don't use or wear because of sloppy details.
      One detail I am learning the value of is lining or double layering a garment. Lining has several benefits. It stabilizes weak areas, it gives edges a professional look, and often it eliminates the need to wear an undershirt or slip. I made a very simple, double layered tank and was very happy with the results.


      Layering takes more time and material, but the finished result does not need to be hemmed so it makes up for the extra effort. To make this I cut out four pieces of a basic tank.

     This orangey color did not photograph well so you will have to excuse the pictures. I wanted a bit of a ruffle on the shoulders to add interest so I also cut out 2 strips 12 inches long. I made the belly a bit loose to accommodate my baby bump so I also cut out strips for a band across the bottom. I cut out four so the band would also be double layered.


     First, I sewed two layers of the shirt together right sides together leaving the bottom open. I turned them right sides out and sewed the other two layers the same way. Now I sewed them both together just as you would a normal garment. At this point you can either hem the bottom or as I did, add a band. The band was sown together first just as the shirt layers were and then sewn to the bottom of the shirt. Now I didn't have to hem anything! Whoohoo! I really dislike hemming!
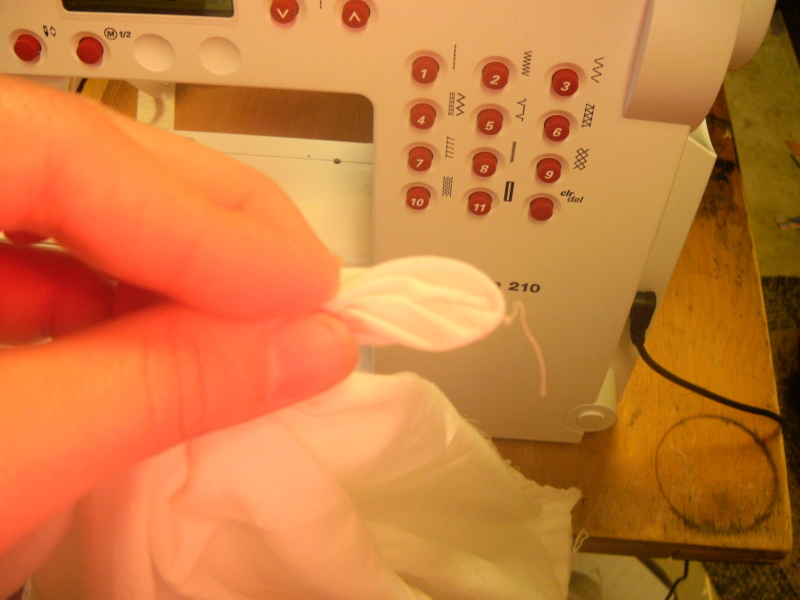
      The easiest way to make a ruffle is to set your stitch length to the longest it will go, and your tension to the tightest it will go. The material will ruffle as you sew. If you want a tighter ruffle just pull gently on your bottom thread and it will ruffle up tighter. I sewed my ruffles onto the edge of my sleeve then sewed down the other edge of the ruffle.


     There is no end of options for what can be done to add a bit of interest to an otherwise plain shirt. I kept this pretty simple.


      And one more look at the finished product.


       Ho hum, speaking of details...I suppose I better consider cooking dinner a detail and give that some attention. Happy Sewing!
Linking to:
Tea Rose Home Link Party
Sew Much Ado: We did it!
Someday Crafts whatever goes wednesday
Freckled Laundry: Air your laundry friday

Friday, February 25, 2011

Smiles for Free

First signs of spring.


A rainbow of baby diapers drying in the sun.


Happy yellow flower pots.


Fresh baked bread.


My window sill herb "garden". (There are seeds in those, they arent just empty pots!)


Bright flowers on my table (even if they are fake!)


A fat stack of new fabric.


     What's right around you that makes you smile?

Thursday, February 24, 2011

Scrap wood wall decor

      I love signs. I'd plaster them everywhere, but I manage to use moderation at the risk of my walls looking too much like a newspaper. As much as I like them, I don't like to pay for them. Thankfully, a handy pile of scrap wood and a paint brush can do the trick for me just as well. I wanted a small sign to fill an annoying empty space above the curtains in my bedroom. There would be no bare space if I weren't too lazy busy to make proper ceiling to floor curtains. That's beside the point. First off, I shopped my hubby's scrap wood pile and found a piece the right size. It needed to be the right size, because I have a phobia of chopping off appendages with power tools. If you knew my tendency to create disaster, you would understand. Here is my starter piece.


   Pretty little dear isn't it? I gave it light sanding, just enough to get the splinters off. I like all the gouges and dents to stay. It adds character.
      Next, I stained it with some I had lying around. It must be very old stain as it had very dubious looking chunkies floating through it.
      (Note to self: next time you feel the need to slather your hands in oil based stain, you might better check to see if you have something besides water to get it off with!)

    
     Now it needed some color. I chose to give it a white washed look which can be done by thinning out white paint with water. As you can see, it gives it a chalky cover and some of the darker grain shows through.


     Next comes the fun part, putting words on it. If I had one of those fancy smancy silhouette machines it would all be perfectly sized and centered. No fancy smancy machines here though, just a plain ol' stencil or if I'm feeling brassy, free hand. I prefer to put my letters on with pencil first, those mistakes are easier to sand off than paint. After the letters are on and thoroughly dry, it needs a little distressing. I like to use either masking tape or sandpaper to distress. Masking tape has to be used on slightly wet paint and it pulls off the paint in chunky bits. The letters were too small on this one to use that method, so I used a fine grit sandpaper. Rub a bit here and rub a bit there and call it good. Here is my final product.


     As it turns out after all that, I didn't like it in that spot above my curtains! I'm still going to use it in my room, just not in that spot. So now I have two unsightly screws in the ugly, annoying, bare spot. More motivation for curtain sewing I guess. This little saying is to help remind me to be busy planting the positive in my thoughts and speech so the negative will have no room grow.
     Here is a couple of other signs I've made using the same method.


      They aren't perfect and aren't meant to be, and you sure can't beat free!
      (one more note to self: How many pieces of clothing must you ruin with paint before you understand you will NEVER be able to NOT make a mess no matter how small the project!)
Linking this to Funky Junk's SNS 70

Wednesday, February 23, 2011

Springtime ruffles


     I saw some super cute little girl dresses in a store the other day that I felt I could copy fairly easily. Why buy when you can make it for for a fraction of the cost, right? When I was little, my mom made me "shirt dresses" to play in, and I loved them. The dresses I saw reminded me of them, only they were a tad more fashionable than the ones I wore. (no offense mom!)


     I have a couple nieces with birthday's coming up, so I  thought I'd give these a whirl for presents. I purchased a few plain, inexpensive tee shirts at Walmart to use as my base. I made one for my own munchkin first for practise. They were a little more tedious than I anticipated, but the finished result was worth the work.


     These will be perfect for summer. I plan on making a less fluffy version of the skirt for myself for summer. I really enjoyed how this project stretched me a little and taught me how to do something I'd never tried before.
Linking this to:
 Tea Rose Home linky party 
Someday Crafts Whatever Goes Wednesday
Funky Junk SNS 70

Thursday, February 17, 2011

Gardening Fun

  
      For the past three days, my little helper and I have been doing a lot of this.


      We've been playing with a lot of these.

     
      I sincerely hope in a few months I don’t just have a pretty dirt plot still. This is my first attempt at playing farmer, and I'm having great fun. I'm not expecting bumper crops, but I do hope I get a few yummy pieces out of this. I've planted tomatoes, green beans, potatoes, onions, bell peppers, lettuce, squash, cucumber, and watermelon. On my deck I have some pots with freshly planted strawberries, and I'm going to put pots of herbs on my kitchen window sill. Now I've done all the hard part, and I just have to be patient. I have to admit, I planted yesterday, and I did check this morning to see if anything had come up yet. Pathetic, I know. I can't help myself, patience just isn't my thing.
      I'm counting on this pretty girl to keep all the hungry bunnies out of my garden.

    
     I'm thinking she's going to love gardens after this...if anything comes up that is.

Monday, February 14, 2011

shirt fail (sorta)

      I got the most fabulous Valentine's gift from God today...a warm sunny day...And it is to be warm and sunny all week!! I intend to be most productive this week. To start I attempted to copy a style shirt that a friend of mine recently had great success copying as well. I'm not sure how to post a picture of it from online, but its rather loose with flowy sleeves.  The sleeves are not sewn in, but rather, are cut as one piece with the main part of the shirt. I thought that this would make it a simple thing to copy. Apparently not.
       I traced a shirt that I already had, but made it larger and exaggerated the sleeves. It seemed to be going OK, until I realized I had cut the neck binding too short. Whoopsie.


       Well that could be fixed with some strategically placed flowers, I decided. After completing the shirt I did not have at all what I had envisioned in my head. The sleeves were not flowy, it was the wrong type of material completely for this style, and it was much more fitted than the style I wanted.  Here is the final outcome.


     It’s a perfectly fine shirt, it just doesn't match the shirt in my head. Oh well, that's the fun of sewing with no pattern. You might just end up with a surprise when you are all done. I suppose I'll try it again and see what happens this time.


Thursday, February 10, 2011

Goals

      It has been dreadfully cold for simply ages. It could be worse; I could be living in Michigan or somewhere equally as North Pole like. Cold weather is very counterproductive to my project inventing self. I can’t paint anything because the paint won’t work right and I might get frost bite...or just really really cold which is about the same thing in my mind. I can’t really sew much because my sewing area is outside in a utility room that is as frigid as an ice box, and after about 10 minutes, I can't feel my fingers.  No one wants to garage sale in the cold so my "junking" habits are severely limited. (much to my mister's delight) So while bemoaning my temporary freeze (ha-ha no pun intended!) on all things I like to do best, I've created a list of what I'll do when the thermometer hits 60 degrees and stays that way for more than three hours.
  1. Organize my fabric and craft area so that it is easy to use and pretty to look at.
  2. Refinish furniture.
  3. Recover dining room chairs.
  4. Sew myself some shirts and dresses.
  5. Learn how to sew button holes.
  6. Sew a bed set for toddler bed.
  7. Curtains for sliding glass door.
  8. Curtains for master bedroom.
  9. Create some sort of side table for couch.
  10. Sew a bed skirt for my bed.
  11. Plant vegetable garden.
  12. Plant flowers.
  13. Fix a new seat for outside swing.
  14. Re-do deck table.
  15. Sew cute and adorable things for new baby
Well now, that might keep me busy for a day or two at least! Excuse me while I go stare longingly at the thermometer.

Friday, February 4, 2011

Puckered pillows

       I have no idea if that's what they are called but its what I call them. And I really like them. This is what I am talking about.


      I'm not sure if I'm the only one has noticed this, but pillow shams and decorative pillows are ridiculously over priced. I simply cant bring my thrifty lil heart to spend $20 on a pillow I know it took only about  a fourth or half yard of fabric to make! I have no problems, however, staring at them in the store and then going home and shamelessly copying what I just saw.
      I needed some shames for the pillows on my bed so I copied this puckered pillow look. I bought a queen size flat white sheet at Walmart for about $5. Sheets are a great source for cheap material! I made two pillow shams and didn't even use half of it so they cost me maybe a dollar each? To make the puckers you just draw dots where you want them and then gather up a small amount of material like so.


      Sew over it back and forth several times. Do all the dots that way, turn right side out and your done! Cheap and pretty pillows! Pillows might be the funnest thing to make to me because they are so fast, cheap, and add so much to your decor. I made two more for my bed out the sleeves of an old sweater, and a ruffled one out of a shirt that shrunk in the wash.


Tuesday, February 1, 2011

A new skirt in 30 minutes

     Last week was an absolute debacle for getting anything accomplished and consequently, I had absolutely nothing to post. Unless of course, you are very interested in seeing pictures of someone else's very messy house. (which, come to think of it, might be quite enjoyable if it weren't of my house!) Things seem to have returned to some form of sanity so I did some sewing today to celebrate. Actually, I had errands to run, but it was raining buckets and dark as tombs outside so I hibernated inside instead.
     This is about the easiest and fastest piece of clothing there is to make, and endless possibilities of variations. Meet my 30 min skirt...or skirts as the case may be.


     Just a note, the hems really are not drooping to the left its just the way they are hanging. Anyway, the tops are stretchy knit making them very comfy. This makes them ideal if you happen to be pregnant which I happen to be at the moment. I have made at least a half dozen like this while not pregnant just because they are so easy and comfortable, and I'm partial to drop waist styles anyway. The waist doesn't need to be contrasting, in this case I used cotton on the bottom so I didn't really have a choice.
    Basically I cut an A-line skirt and made the waist my hip measurement. I cut two pieces of knit that looked like this. The narrowed in measurement being my waist measurement.


      I sewed up the sides of the skirt and up the sides of the waist piece. Next I folded the waist part over on itself right sides out and sewed it to the top of my skirt. Hem the edges and all done! For varieties' sake I added a ruffle onto the grey plaid one. There really is all sorts of options you can do...A-line, circle, straight, asymmetrical, long, short, with ruffles, pleats, and whatever else you can dream up. I exaggerate even on the 30 minute bit, once you get the hang of it and if you don't have interruptions you can easily whip one out in 15 minutes! These two cost me maybe 75 cents each. The grey fabric I got at a thrift store, and the other I got for free. Can't beat that cost!
      I think that next I'm going to try a double layer one with some of the thinner cotton fabrics I need to use up. Its about time I did some sewing, my fabric stash is getting a little out of hand...as in, it needs its own house! I think I have a serious fabric buying sickness.