Tuesday, July 31, 2012

Sewing Tip - Fail Proof Exposed Zippers


      Exposed zippers are one of those things that I really didn't care for the first time I saw one. I've warmed up to them though, and now I quite like them. They add just a touch of modernness that I like. Here is a super simple way to put one on anything you've made, or bought for that matter. I'm applying one here, on a silk chiffon top I made for my Etsy shop.
     Start with a top laid out flat, like so.


     Find the center of the neckline. Center your zipper down the shirt and tape it on. Make sure the zipper pull is flush with the hemline.


        Start sewing the zipper to the shirt, as close to the teeth of the zipper as possible. Fold the extra zipper tape down at the top before you begin sewing.


      When you get to the base of the zipper, fold up the extra zipper tape under the zipper.


    Leave enough at the base for you to be able to sew around the mettle.


      When you get finished, remove the tape. Sew around the perimeter of the zipper, as close to the edge as you can get.


      Now, open the zipper.


      Use a fine pair of scissors and cut open the shirt.


     Trim the fabric as close to the seam line as you can get. Apply fray check to seal the edges.


      Enjoy your new top!


Proverbs 10:12   Hatred stirreth up strifes: but love covereth all sins. 
Pin It

Friday, July 27, 2012

Friday Favorites - All of the Above

     The sun is shining and it's Friday...such a lovely combination. I feel bad being grouchy about all the rain, since I know most of the rest of the country really needs it. I wish I could box some up and send it to you, really I do. Here's all my random delights from this last week. Have a browse and enjoy.

1. This crochet skirt, which is just fabulous in my opinion. Its very similar to my tablecloth skirt, and now I'm fixated on finding a bigger tablecloth so I can have a long one to dip dye.

 :)
Pinterest (I tried finding the source, anyone know?)


2. The fact that sparkles, metallics, and shine are all the rage for Fall. I adore shine in any form...as evidenced by the addition of many new shiny and sparkly things to my Etsy shop. I plan to contribute to the trend as much as possible.

fall sparkle

Silver Sequin Tank, Metallic Tank, Silver Metallic Tank

3. This wrap skirt tutorial made by Ikatbags. Its for woven fabric, and has great info about darts and such.


4. YOU! Some of you have dropped back around over the last few months to show me things you've made using my tutorials...and I LOVE it! 
  • Carmon from Vintage is Better made herself a batwing top. See it here. 
  • Jessica from JWO Designs made a cute fishtale skirt using my maxi skirt tutorial. See it here.
  • Crafted by Mama made a smocked maxi skirt. See it here.
  • Nadia made her very first skirt using the smocked maxi skirt tutorial! See it here.
     The whole reason I write tutorials, is to help people see how simple and understandable sewing can be. Its so liberating to know you don't just have to be stuck with what you can afford/find at a store to wear...and anyone can do it!

     Well, I'm off to my crazy cycle of cramming as much work as possible in between the needs of two very active little people. Have a fabulous weekend!

Deuteronomy 7:9   Know therefore that the LORD thy God, he is God, the faithful God, which keepeth covenant and mercy with them that love him and keep his commandments to a thousand generations; 
Pin It

Tuesday, July 24, 2012

Lace Pencil Skirt Tutorial


      So how do you feel about lace? I'm pretty much a big fan of it in pretty much any form. Its classic. I like classic. This skirt is easy and I'm going to show you to make it, because you're going to need one. And once you make one, you'll probably need to make another color.


       So, here's how its done. You need a yard of lace, preferably lace that has a nice edge. We like to skip hemming whenever possible. You also need a yard of lining. I stuck to neutral colors, but I think white lace over a bright color would be fabulous too. And lastly, you need enough 2 inch elastic to fit around your waist.
     Measure your hip and your waist ( or wherever you like the waist of your skirts to sit). Lay your fabric out folded in half. Cut it as long as you want your skirt to be. I cut my lining an inch shorter than my lace. I did the lining 20 inches.


      Now, mark with chalk your waist measurement at the top and bottom of the fabric. Half way in between mark the hip measurement.


      Now, curve out a line following those points, and cut it out. I use my french curve ruler for this, so that I make sure the line is all neat and tidy like.


       Do the same thing for your lace. If your lace already has a finished edge, make sure to measure up from the bottom rather than from the top.


        Once you have both skirts cut out, sew up the sides of each one.


      Put the lining inside the lace. Normally, when you do a lining, you would want the lining seam to face the lace seam on the inside of the garment. Lace is see through so in this case, you want both seams facing inward. That sounded confusing...basically, you want the right sides of both the lace and the lining to face out. Grab your elastic and cut it long enough to fit around you comfortably.


      Sew the ends of the elastic together.


      The way that is shown above is really not the best way to sew it together. Its neater if you sew it like a regular seam, and then fold the seam flat and sew it down again. Anyway, now you have a waistband of elastic. Next you need to pin it to the top of your skirt and lining. I like to mark the sides of the elastic with chalk so that I can pin it to the side seams accurately.


     I pin it at the side seams, and then the centers of both front and back.


      Sew the elastic to the skirt. You'll need to pull the elastic as you sew, and you'll probably need to help it through the machine with your other hand. I use my serger to sew the elastic. If you lower the cutting knife first, it sews on just nicely.


      That's all there is to it!


      See? Didn't I tell you that was easy?!


     Both versions are available in my Etsy shop, and the cream one will be available at AJ's Boutique. Happy Sewing!

Psalms 19:7   The law of the LORD is perfect, converting the soul: the testimony of the LORD is sure, making wise the simple. 

Sunday, July 22, 2012

Drop Elastic Waist Dress Tutorial


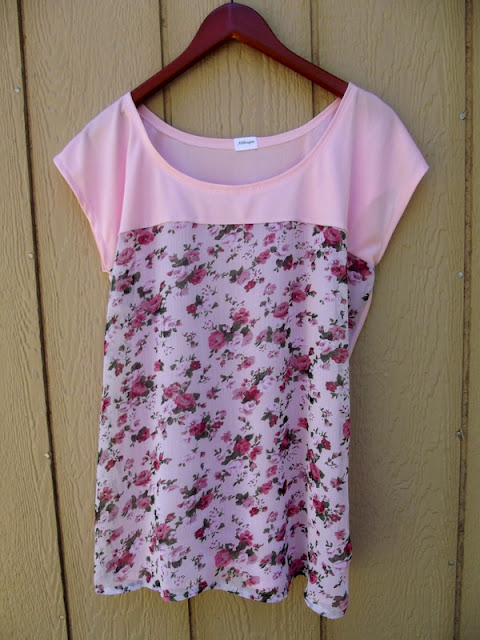
     The sun finally popped its pretty little head out for just long enough for me to snap some pictures of a few completed projects. So, we get a blog post and a new tutorial! Huray for sunshine! You know, I've never bought a single dress that had this sort of waist. The waist always has seemed to hit at an awkward and unflattering spot, so I've always shunned them. I've seen some lower waisted ones about lately, and decided to give one a shot. I'm really quite in love with this style now...so super comfy!


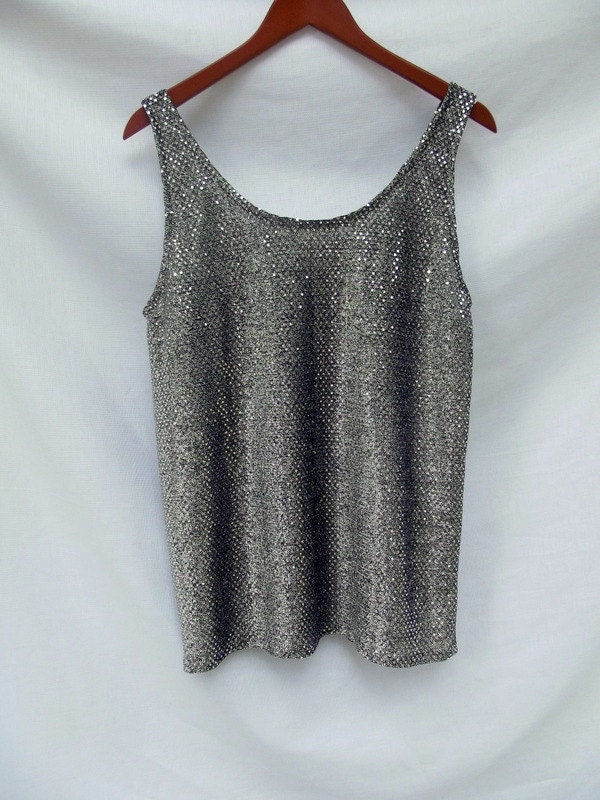
       Of course, I had to try it in cobalt, naturally. I'm sure you didn't see that one coming. This dress is so simple to make, you must try it...I'm telling you, you will adore how easy it is to wear. Its like getting away with wearing your favorite over sized T shirt in public! I used a matte polyester knit that has a bit of stretch, but not a whole lot.
      Here is how you do it. First you cut out the top section, or the shirt part of the dress. Cut a rectangle as wide as you are plus an inch. Make the length long enough to hit your hips. About 27 inches is what I used for the length. Cut a neck hole in the rectangle. I wanted a boat neck, so I did a 5 inch wide by 3 inch deep curve on the fold. I like to taper in the sides under the arms a bit for it to have a bit more shape to it. Make sure to have happy music playing on your phone, and a tall cup of coffee sitting near by for the optimum sewing experience.


     Now for the skirt part, you need another rectangle. This should be as wide as your shirt was, and as long as you want it to be. Mine was only 16 inches, but I think I'd do it just a hair longer next time.


      Now, sew up the sides of both the shirt part and the skirt part. Leave a 9 inch opening for the arms.


     With RIGHT sides together, slip the skirt into the shirt. Pin the side seams.


      Sew the two sections together. It should look like so.


     Now you need some elastic. I believe mine was 1/4 inch, and I cut long enough to fit around my hips snugly.


       Sew it on to the waist seam using a narrow zigzag stitch. Notice, I'm still using my walking foot...I'm pretty much addicted to that thing...makes everything just sew together so smoothly! That was money well spent for sure! Pull the elastic nice and tautly while you are sewing it.


     Now your waist seam should look like this.


      I decided to sew little decorative tabs on the sleeves. They just seem to add the right touch to this style sleeve.


      That's all there is to it!


    It looks rather funny just hanging on the hanger doesn't it? That's ok, because its fab to wear.


      You'll like it best in cobalt blue...but, I'm not telling you what to do or anything...I'm just recommending. Throw on some tights, boots and a cute scarf, and you'll be set for cold weather too. This dress will also be available for purchase in my Etsy shop, if you're more the shopping type than the sewing type.
If you make one, I wanna see! I just love to see your spin on things! Have a  happy week!

Philippians 4:6   Be careful for nothing; but in every thing by prayer and supplication with thanksgiving let your requests be made known unto God. 

Friday, July 20, 2012

Friday Favorites - Chiffon

     I am so glad its Friday its not even funny! This has been the longest week ever...a baby with two teeth coming in at one time, and the grey-est, gloomiest weather every day for like the last month...or so it seems. If you were wondering about the lack of posting this week...there ya go, that's why. Grey lighting and grouchy babies don't do a whole lot for the productivity level around here.
     So, lets move on to something a little more cheerful...like chiffon! I've always been a knit girl...but I'm venturing more and more into the world of wovens, and chiffon is definitely my favorite among woven fabric. It floats, its feminine, and its elegant. Once you get the hang of it, its actually pretty easy to work with too. Here  is some chiffon loveliness gleaned from my Pinterest boards.


chiffon.

Chiffon Dress

Love tho coral colour :}

Ruffly sheer shirt

Chiffon


that neckline


flow

      This is a really good tutorial I found on How Joyful

Chiffon

      Of course, there is also these two, I posted here, using chiffon.


     I'm working on some chiffon tops for my shop, and if the weather ever clears up...I might actually manage to get a some pictures and tutorials up for them. 
     Hope you have a happy, sunny weekend!

Psalms 37:5   Commit thy way unto the LORD; trust also in him; and he shall bring it to pass.
Pin It